Milky Way Season 2026: Best Dates to See & Photograph Our Galaxy
Quick Answer
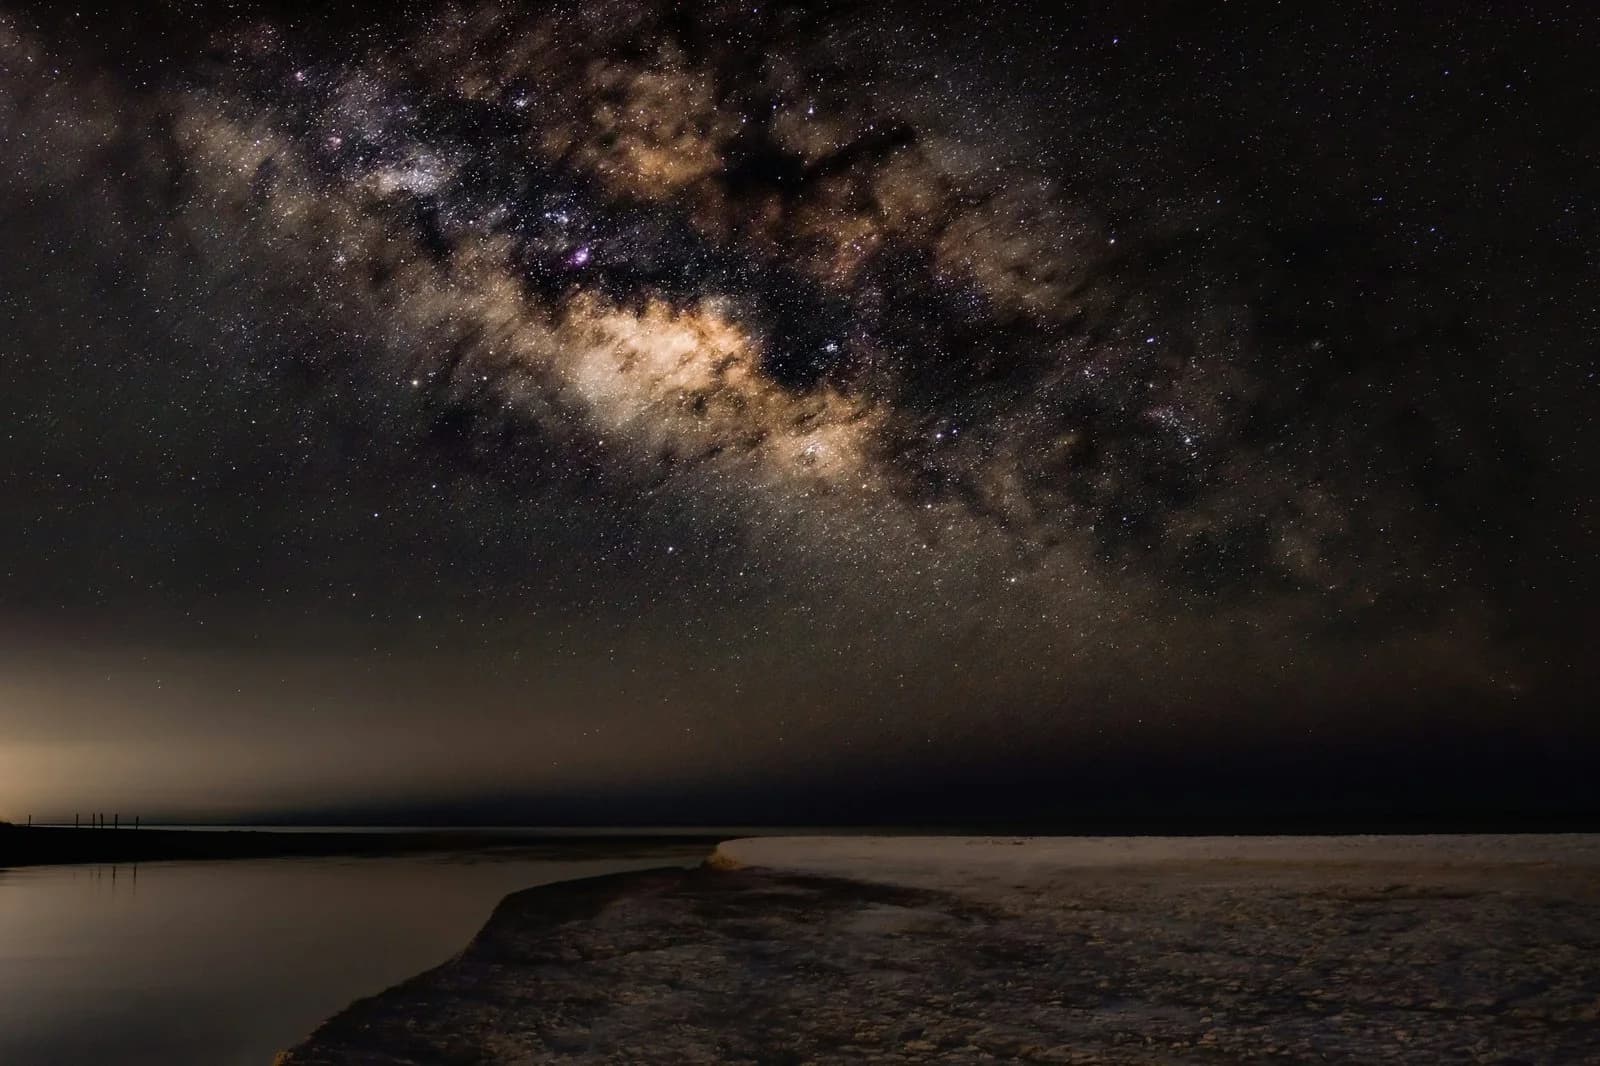
Milky Way season in the Northern Hemisphere runs from March through October 2026, with peak viewing in June and July 2026.** The best individual nights are always within ±3 days of a new moon: specifically July 15, August 12, September 11, and October 10, 2026. The galactic core in Sagittarius is the photogenic centerpiece, and is only visible from late March through early October from mid-northern latitudes. You need a dark sky location (Bortle class 1-3) and a camera with manual controls for photography. No equipment is required to see the Milky Way with the naked eye from a truly dark site.
Milky Way season in the Northern Hemisphere runs from March through October 2026, with peak viewing in June and July 2026 when the galactic core is visible from shortly after sunset through much of the night. The best individual nights are always within ±3 days of a new moon, specifically July 15, August 12, September 11, and October 10, 2026. The galactic core (the bright, photogenic center of our galaxy in Sagittarius) is the most visually dramatic part of the Milky Way, and it is only visible from late March through early October from mid-northern latitudes. By late October, the core sets shortly after sunset, ending the season until the following spring.
If you are planning to photograph or simply observe the Milky Way in 2026, the single most important factor is the Moon. A full moon is bright enough to completely wash out the Milky Way. Even from a dark sky location, a full moon turns the sky into a washed-out blue-grey that hides all but the brightest stars. The new moon nights are when the sky is darkest, and the ±3 day window around each new moon is the practical observing window. Our moon phases 2026 page lists every new moon date for the rest of the year with exact UTC times.
What "Milky Way Season" Actually Means
The Milky Way is always in the sky; it is, after all, the galaxy we live in. But the bright, photogenic galactic core (the center of the galaxy, located in the constellation Sagittarius) is only visible from the Northern Hemisphere during a specific window each year. This is because of the geometry of Earth's orbit around the Sun: from late autumn through winter, the Sun is in the same part of the sky as the galactic core, which means the core is above the horizon during the daytime and below the horizon at night. As Earth moves around the Sun, the night side of Earth gradually rotates to face the galactic core, and the core becomes visible in the night sky starting in late March.
The visibility window by month, from mid-northern latitudes (around 40°N):
| Month | Galactic Core Visibility | Best Time to View |
|---|---|---|
| March | Rises 2 to 4 AM, visible before dawn only | Pre-dawn, southeast horizon |
| April | Rises around midnight, visible rest of night | 1 AM to dawn |
| May | Rises around 10 PM, visible rest of night | 11 PM to dawn |
| June | Rises around 8 PM, visible most of night | 10 PM to 4 AM |
| July | Visible right after sunset through 2 to 3 AM | 9:30 PM to 2 AM (peak month) |
| August | Visible at sunset, sets around 1 AM | 9 PM to 1 AM |
| September | Visible at sunset, sets around 11 PM | 8 PM to 11 PM |
| October | Visible at sunset, sets by 9 PM | 7:30 PM to 9 PM |
| November to February | Not visible (above horizon during daytime) | — |
The progression is straightforward: the core rises earlier each month from March through July, then begins setting earlier each month from August through October. June and July are the peak months because the core is visible for the longest period, from shortly after sunset through much of the night.
For astrophotographers and serious observers, the practical implication is that the "best" month depends on what you want. June and July give you the longest shooting window. August is excellent because the August new moon (August 12, 2026) coincides with the new moon that also produces the best Perseid meteor shower viewing. See our August 12 double event page for that story. September and October are pleasant temperature-wise but the core sets early.
For the broader dark-sky calendar, see our best stargazing nights 2026 page.
The New Moon Calendar for 2026: Your Milky Way Schedule
Here are the new moon dates for the rest of Milky Way season 2026, with the practical observing windows:
| New Moon Date | Exact UTC Time | Best Observing Window | Notes |
|---|---|---|---|
| July 15, 2026 | ~09:44 UTC | July 12 to 18, 2026 | Peak season. Core visible most of the night |
| August 12, 2026 | ~17:37 UTC | August 9 to 15, 2026 | Best month of 2026. Also Perseid peak and total solar eclipse |
| September 11, 2026 | ~03:27 UTC | September 8 to 14, 2026 | Good conditions, core sets around 11 PM |
| October 10, 2026 | ~15:50 UTC | October 7 to 13, 2026 | Last month of 2026 season, core sets by 9 PM |
The August 12, 2026 new moon is the standout date of the year. It coincides with both the peak of the Perseid meteor shower and a total solar eclipse earlier in the day. This is genuinely rare: the new moon produces perfect dark-sky conditions for the Perseids, and the same Moon geometry produces the eclipse. For astrophotographers, the night of August 12 to 13, 2026 is likely the best single Milky Way + meteor shooting night in years. For the full story, see our August 12 double event page.
Avoid the full moon windows, which fall roughly two weeks after each new moon. The October 26, November 24, and December 24, 2026 full moons are particularly problematic — the latter two are supermoons, closer and brighter than normal full moons, and they effectively kill Milky Way photography for the surrounding week. See our 2026 supermoon dates page for the full supermoon calendar.
Where to See the Milky Way: The Bortle Scale and Dark Sky Locations
The single biggest factor in Milky Way visibility (bigger even than the moon phase) is light pollution. From a typical suburb (Bortle class 6-7), you can see maybe a few dozen stars, and the Milky Way is invisible or barely detectable as a faint smudge. From a true dark sky location (Bortle class 1-2), the Milky Way is bright enough to cast a faint shadow on white surfaces, and tens of thousands of stars are visible. The difference is not subtle.
The Bortle Scale is the standard measure of sky brightness, ranging from class 1 (the darkest skies on Earth, far from any artificial light) to class 9 (the inner city of a major metropolis). Here is a rough breakdown:
| Bortle Class | Sky Description | Milky Way Visibility |
|---|---|---|
| 1 | Excellent dark sky | Milky Way casts shadows; structure clearly visible |
| 2 | Typical truly dark sky | Milky Way clearly visible with structure |
| 3 | Rural sky | Milky Way clearly visible but structure muted |
| 4 | Rural/suburban transition | Milky Way visible but lacks detail |
| 5 | Suburban sky | Milky Way faintly visible near zenith |
| 6 | Bright suburban sky | Milky Way essentially invisible |
| 7 to 9 | Suburban to inner city | Milky Way invisible |
You can check the Bortle class of any location using the free light pollution map at lightpollutionmap.info. For Milky Way photography, you want Bortle class 1 to 3, ideally class 1 to 2. Even a 30-minute drive from a small city can produce a dramatic improvement. A 2-hour drive from a major city can put you in true dark sky territory.
Top dark sky locations for Milky Way photography (Northern Hemisphere):
- Cherry Springs State Park, Pennsylvania: one of the darkest spots in the eastern United States, designated as a Dark Sky Park. Bortle class 2. Popular with astrophotographers from the entire northeastern US.
- Big Bend National Park, Texas: designated as an International Dark Sky Park. Bortle class 1. Some of the darkest skies in the lower 48 states, with the advantage of clear weather most of the year.
- Joshua Tree National Park, California: Bortle class 2 to 3 in the interior. Easy access from Los Angeles and San Diego, popular with landscape astrophotographers.
- Death Valley National Park, California: Bortle class 1 to 2. Designated as a Dark Sky Park. Hot in summer but excellent in spring and fall.
- Headlands International Dark Sky Park, Michigan: Bortle class 3. The best easily-accessible dark sky in the Great Lakes region.
- Brecon Beacons National Park, Wales: Bortle class 2 to 3. The first International Dark Sky Reserve in Europe. Easy access from southern England.
- Aoraki Mackenzie International Dark Sky Reserve, New Zealand: Bortle class 1. The best dark sky in the Southern Hemisphere, with the added bonus of the galactic core being higher in the sky.
- Atacama Desert, Chile: Bortle class 1. Some of the darkest and clearest skies on Earth, with over 300 cloudless nights per year. The world's premier astronomy tourism destination.
Top dark sky locations (Southern Hemisphere): The Southern Hemisphere has a major advantage for Milky Way viewing. The galactic core is higher in the sky, which means it is visible through less atmosphere and appears more spectacular. From mid-southern latitudes (around 30 to 40°S), the Milky Way core passes nearly overhead, producing views that simply are not possible from the Northern Hemisphere. The Southern Hemisphere Milky Way season runs from roughly March through November, with peak visibility in June-August (southern winter).
How to Photograph the Milky Way
Milky Way photography is technically demanding but approachable. Here is the basic recipe, refined over thousands of nights of combined experience from the astrophotography community:
Equipment required:
- A camera with manual controls (any DSLR or mirrorless from the last 10 years will work)
- A fast wide-angle lens (f/2.8 or faster, 14 to 24mm focal length)
- A sturdy tripod
- A remote shutter release (or use the camera's self-timer to avoid shaking the camera when you press the shutter)
- A red flashlight (to preserve night vision while operating the camera)
Standard starting settings:
- ISO: 3200 to 6400 (higher if your camera handles noise well, lower if it does not)
- Aperture: as wide as your lens allows (f/2.8, f/1.8, f/1.4. Wider is always better for Milky Way)
- Shutter speed: 20 seconds (this is the "500 rule." Divide 500 by your lens focal length to get the maximum exposure before stars trail; for a 24mm lens on a full-frame camera, 500/24 = 20.8 seconds, so 20 seconds is safe)
- Focal length: 14 to 24mm on a full-frame camera (24 to 35mm equivalent on APS-C)
- Focus: manual, set to infinity. Use live view zoomed in on a bright star to confirm focus before each session. Autofocus will not work for Milky Way.
- White balance: 3500 to 4500K (cooler produces a bluer sky; warmer produces an orange sky). Shoot in RAW to adjust later.
- File format: RAW, always. JPEG throws away the dynamic range you need for post-processing.
The 500 Rule (for sharp stars): Divide 500 by your focal length (on a full-frame camera) to get the maximum exposure in seconds before stars begin to streak. Examples:
- 14mm lens: 500/14 = 35 seconds (but 25 to 30 is safer)
- 24mm lens: 500/24 = 20 seconds
- 35mm lens: 500/35 = 14 seconds
For crop-sensor (APS-C) cameras, divide by 1.5 (or 1.6 for Canon) to get the effective focal length first, then divide 500 by that. A 24mm lens on an APS-C Canon camera is effectively 38mm, so 500/38 = 13 seconds.
Composition tips: The galactic core is the visual anchor of any Milky Way photo. Find it in the constellation Sagittarius (look for the "teapot" asterism. The core is just above the spout). Frame your composition so the core is positioned thoughtfully relative to foreground elements. A single tree, a rock formation, a tent, a lake reflection all work well. The Milky Way arc rising from the horizon is a classic composition.
Foreground lighting: A pure silhouette foreground can work, but a faintly-lit foreground is usually more interesting. Options: a small flashlight "painted" on the foreground for a few seconds during the exposure; a headlamp on low setting placed behind a rock to provide subtle backlight; or simply shoot during astronomical twilight (when the sky is not fully dark) to capture the foreground naturally.
Post-processing: Milky Way photos require post-processing to look their best. The essential adjustments in Lightroom or similar software: increase contrast significantly, reduce highlights (especially the core), boost shadows (for the foreground), increase clarity and dehaze, adjust white balance to taste (cooler for a more "night" feel, warmer for a more "warm sunset" feel). Most Milky Way photos you see online are heavily processed. That is normal and expected in this genre.
For the timing of when astronomical twilight ends (so you know exactly when "dark enough" begins), see our civil vs nautical vs astronomical twilight page.
The Southern Hemisphere Advantage
The Southern Hemisphere has a significantly better view of the Milky Way than the Northern Hemisphere. The reason is geometric: the galactic core is in the southern celestial hemisphere (in Sagittarius, declination around −30°). From mid-southern latitudes, the core passes nearly overhead at peak season, producing spectacular views where the Milky Way stretches from horizon to horizon. From mid-northern latitudes, the core never rises very high above the southern horizon, which means it is always viewed through more atmosphere and is more susceptible to horizon haze and light pollution.
The Southern Hemisphere Milky Way season runs roughly March through November, with peak visibility in June, July, and August (southern winter). The core is visible for longer periods and at higher altitudes than from equivalent northern latitudes. The Magellanic Clouds (two small satellite galaxies of the Milky Way) are also visible only from the Southern Hemisphere. They add visual interest that northern observers never get to see.
If you have the means to travel for astrophotography, the Southern Hemisphere is genuinely worth the trip. The Atacama Desert in Chile, Aoraki Mackenzie in New Zealand, and the Sutherland region of South Africa are the premier southern dark sky destinations. Each offers skies that simply do not exist in the Northern Hemisphere.
For a related concept, the "golden hour" that photographers use for landscape work that may complement Milky Way photography, see our what is golden hour reference.
Common Mistakes and How to Avoid Them
Mistake 1: Trying to shoot under a full moon. A full moon will completely wash out the Milky Way. Check the moon phase before you go. The ±3 day window around each new moon is your friend.
Mistake 2: Not getting far enough from light pollution. A 10-minute drive out of the city is not enough. You typically need 30 to 60 minutes of driving from a small city, or 2+ hours from a major metro area. Check the Bortle class of your intended location on lightpollutionmap.info.
Mistake 3: Using autofocus. Autofocus does not work for Milky Way photography; there is not enough light for the autofocus system to find contrast. You must focus manually. Set your lens to manual focus, switch to live view, zoom in on a bright star, and turn the focus ring until the star is a sharp point. Then put a piece of tape on the focus ring so you do not accidentally bump it.
Mistake 4: Using too long an exposure. Stars trail if your exposure is too long, and trailing stars look bad in Milky Way photos. Use the 500 rule to calculate your maximum exposure. If you are not sure, err on the shorter side.
Mistake 5: Underestimating noise at high ISO. Modern cameras are good at high ISO, but ISO 6400 still produces noticeable noise. Shoot at the lowest ISO that gives you a properly-exposed image at your chosen aperture and shutter speed. For most fast wide-angle lenses at f/2.8, that means ISO 3200 to 6400 for a 20-second exposure.
Mistake 6: Forgetting to plan foreground composition. A great Milky Way shot needs a great foreground. Scout your location in daylight, identify the composition you want, and plan where the Milky Way will be at the time you shoot. Apps like PhotoPills and Stellarium will show you exactly where the Milky Way will be at any given time and location.
What to Do Next
The next best Milky Way window from mid-northern latitudes is July 12 to 18, 2026 (around the July 15 new moon). On any clear night in that window, you can step outside a dark sky location at 10 PM local time, look south, and see the Milky Way arching across the sky from Sagittarius (low in the south) through Cygnus (nearly overhead) to Cassiopeia (low in the north). Bring binoculars. They will reveal the structure of the Milky Way in stunning detail, including dark nebulae and star clusters invisible to the naked eye.
For ongoing dark-sky planning, bookmark our moon phases 2026 page. For the broader astronomy calendar, see our best stargazing nights 2026 master calendar.
Explore More
- 🌑 Moon Phases 2026: The single most important calendar for Milky Way photography. New moon dates drive the entire shooting schedule.
- 🌑 Moon Phases Explained: The underlying lunar cycle that determines when skies are dark.
- 🌅 Civil vs Nautical vs Astronomical Twilight: When does "dark enough for Milky Way" actually begin? The answer depends on your latitude and the season.
- 🌇 What Is Golden Hour?: The complementary photographic window that can be combined with Milky Way shooting for twilight-to-night transitions.
- ☄️ Meteor Showers 2026: Many of the best meteor shower peaks coincide with new moon windows, making them ideal nights for combined Milky Way + meteor photography.
Frequently Asked Questions
5 questions answered
When is Milky Way season in 2026?
What are the best nights to see the Milky Way in 2026?
What time is the galactic core visible?
Can I see the Milky Way from a city?
When is the Milky Way not visible?
Put this into action
Stop guessing. Use our professional tools to schedule, convert, and manage time zones perfectly — 100% free.
Track Sky EventsOfficial Sources & References
- NASA Science — Official data and scientific overviews for astronomical events and missions.